Desire2Learn > Tools > Zoom >
Creating Pre-Assigned Breakout Rooms
Breakout rooms are sessions that are split off from the main Zoom meeting, allowing users to meet in smaller groups. Pre-assigned breakout groups can be used for collaborative activities like group projects or peer review.
Enabling Breakout Rooms
- Sign in to Zoom Web Portal. Pre-assigned breakout rooms cannot be created through an app.
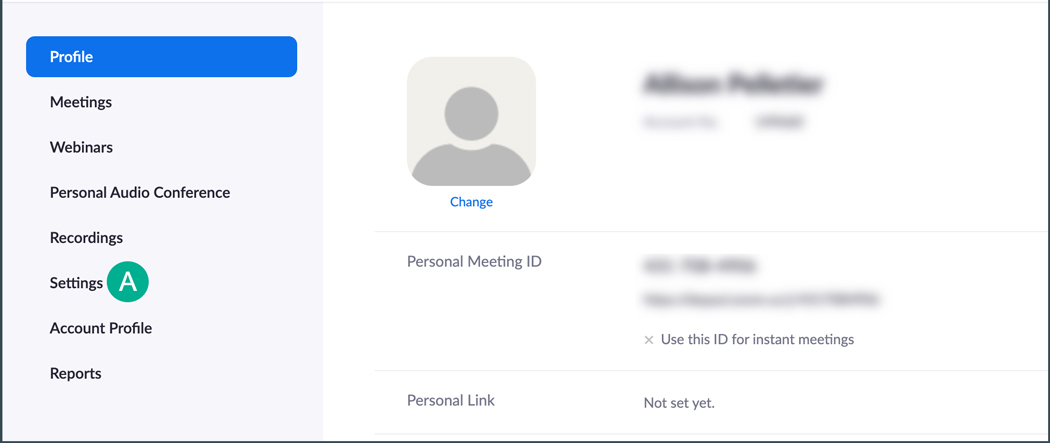
- From the Profile page, select
Settings A.

- Select the section titled In Meeting (Advanced).
- Select the toggle next to “Breakout Room” if not already allowed.
- Select the box next to “Allow host to assign participants to breakout rooms when scheduling.”
- Select Save.
Creating Pre-Assigned Breakout Rooms
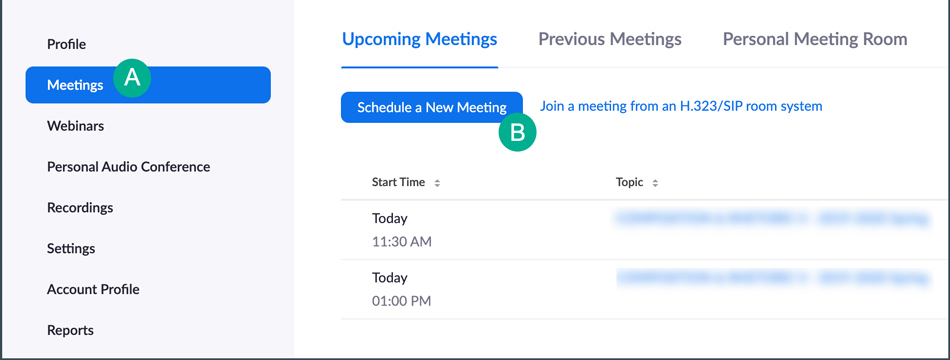
- From the profile page, select Meetings A.
- Select
Schedule a New Meeting B.

- Fill out the details to the meeting.
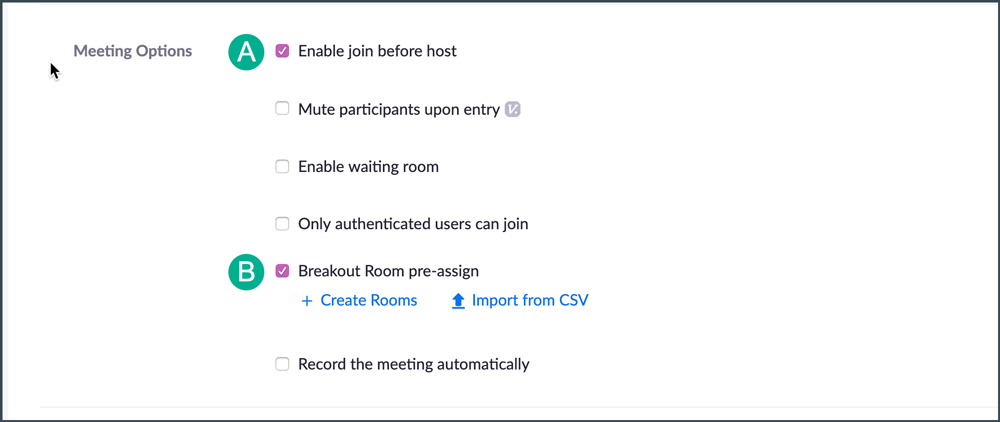
- Select the boxes next to “Enable join before host” A and “Breakout Rooms pre-assign” B.

- Select Create Rooms.
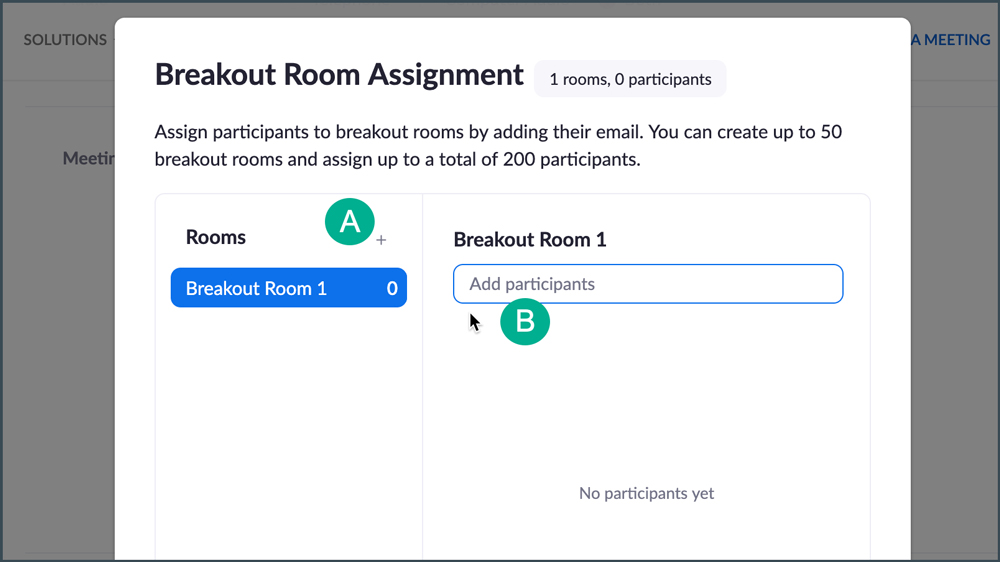
- A pop-up window will appear on the screen. Select the plus sign A to create rooms.
- Add the participants by typing their names into the input field B under the name of the breakout room. It is also possible to import participants using a CSV file. Follow Zoom’s direct instructions for uploading via CSV here.
- After populating all of the rooms, select Save.
- The pop-up window will close. Select Save again to save the meeting.
Note: In order to pre-assign breakout rooms, users must log in to Zoom using their account unless rooms are assigned using a CSV.

Note: You can change the name of the room by clicking on the room title in the left column and then selecting the name in the right column.
Using Breakout Rooms in a Meeting
- When the meeting starts, select Breakout Rooms at the bottom of the Zoom window.
- Once in the Breakout Rooms menu, select Recreate.
- Then, select Recover to pre-assigned rooms.
- A confirmation pop-up will appear. Select Yes.
